Envelope Designs
The Envelope Printery Inc
I have created numerous envelope designs (art & construction) for The Envelope Printery Inc. For the sake of being involved in all steps of the process, below presents body die/foil creation, layout creation, artwork creation, and final products. These specific type of envelopes below are called shape cut TED-C envelopes (Trailing edge Die Cut). TED-C envelopes are an unconventional yet dynamic type of envelope available to be created and used. They have an actual bump-out of any shape on the lefthand side of the envelope and typically are more likely to be opened by consumers because they will literally stick out in the stack, making them a useful tool for marketers. TED-C envelopes require a lot of research and correspondence with USPS MDA specialists, requiring an approval process, to guarantee that they will safely and effectively go through the mail.
Body Die Creation
First step of the process is to design a body die that the client will be happy with, will convert correctly on press, and meets USPS requirements (samples and letter need to be sent for USPS approval).
Software used: Adobe Illustrator

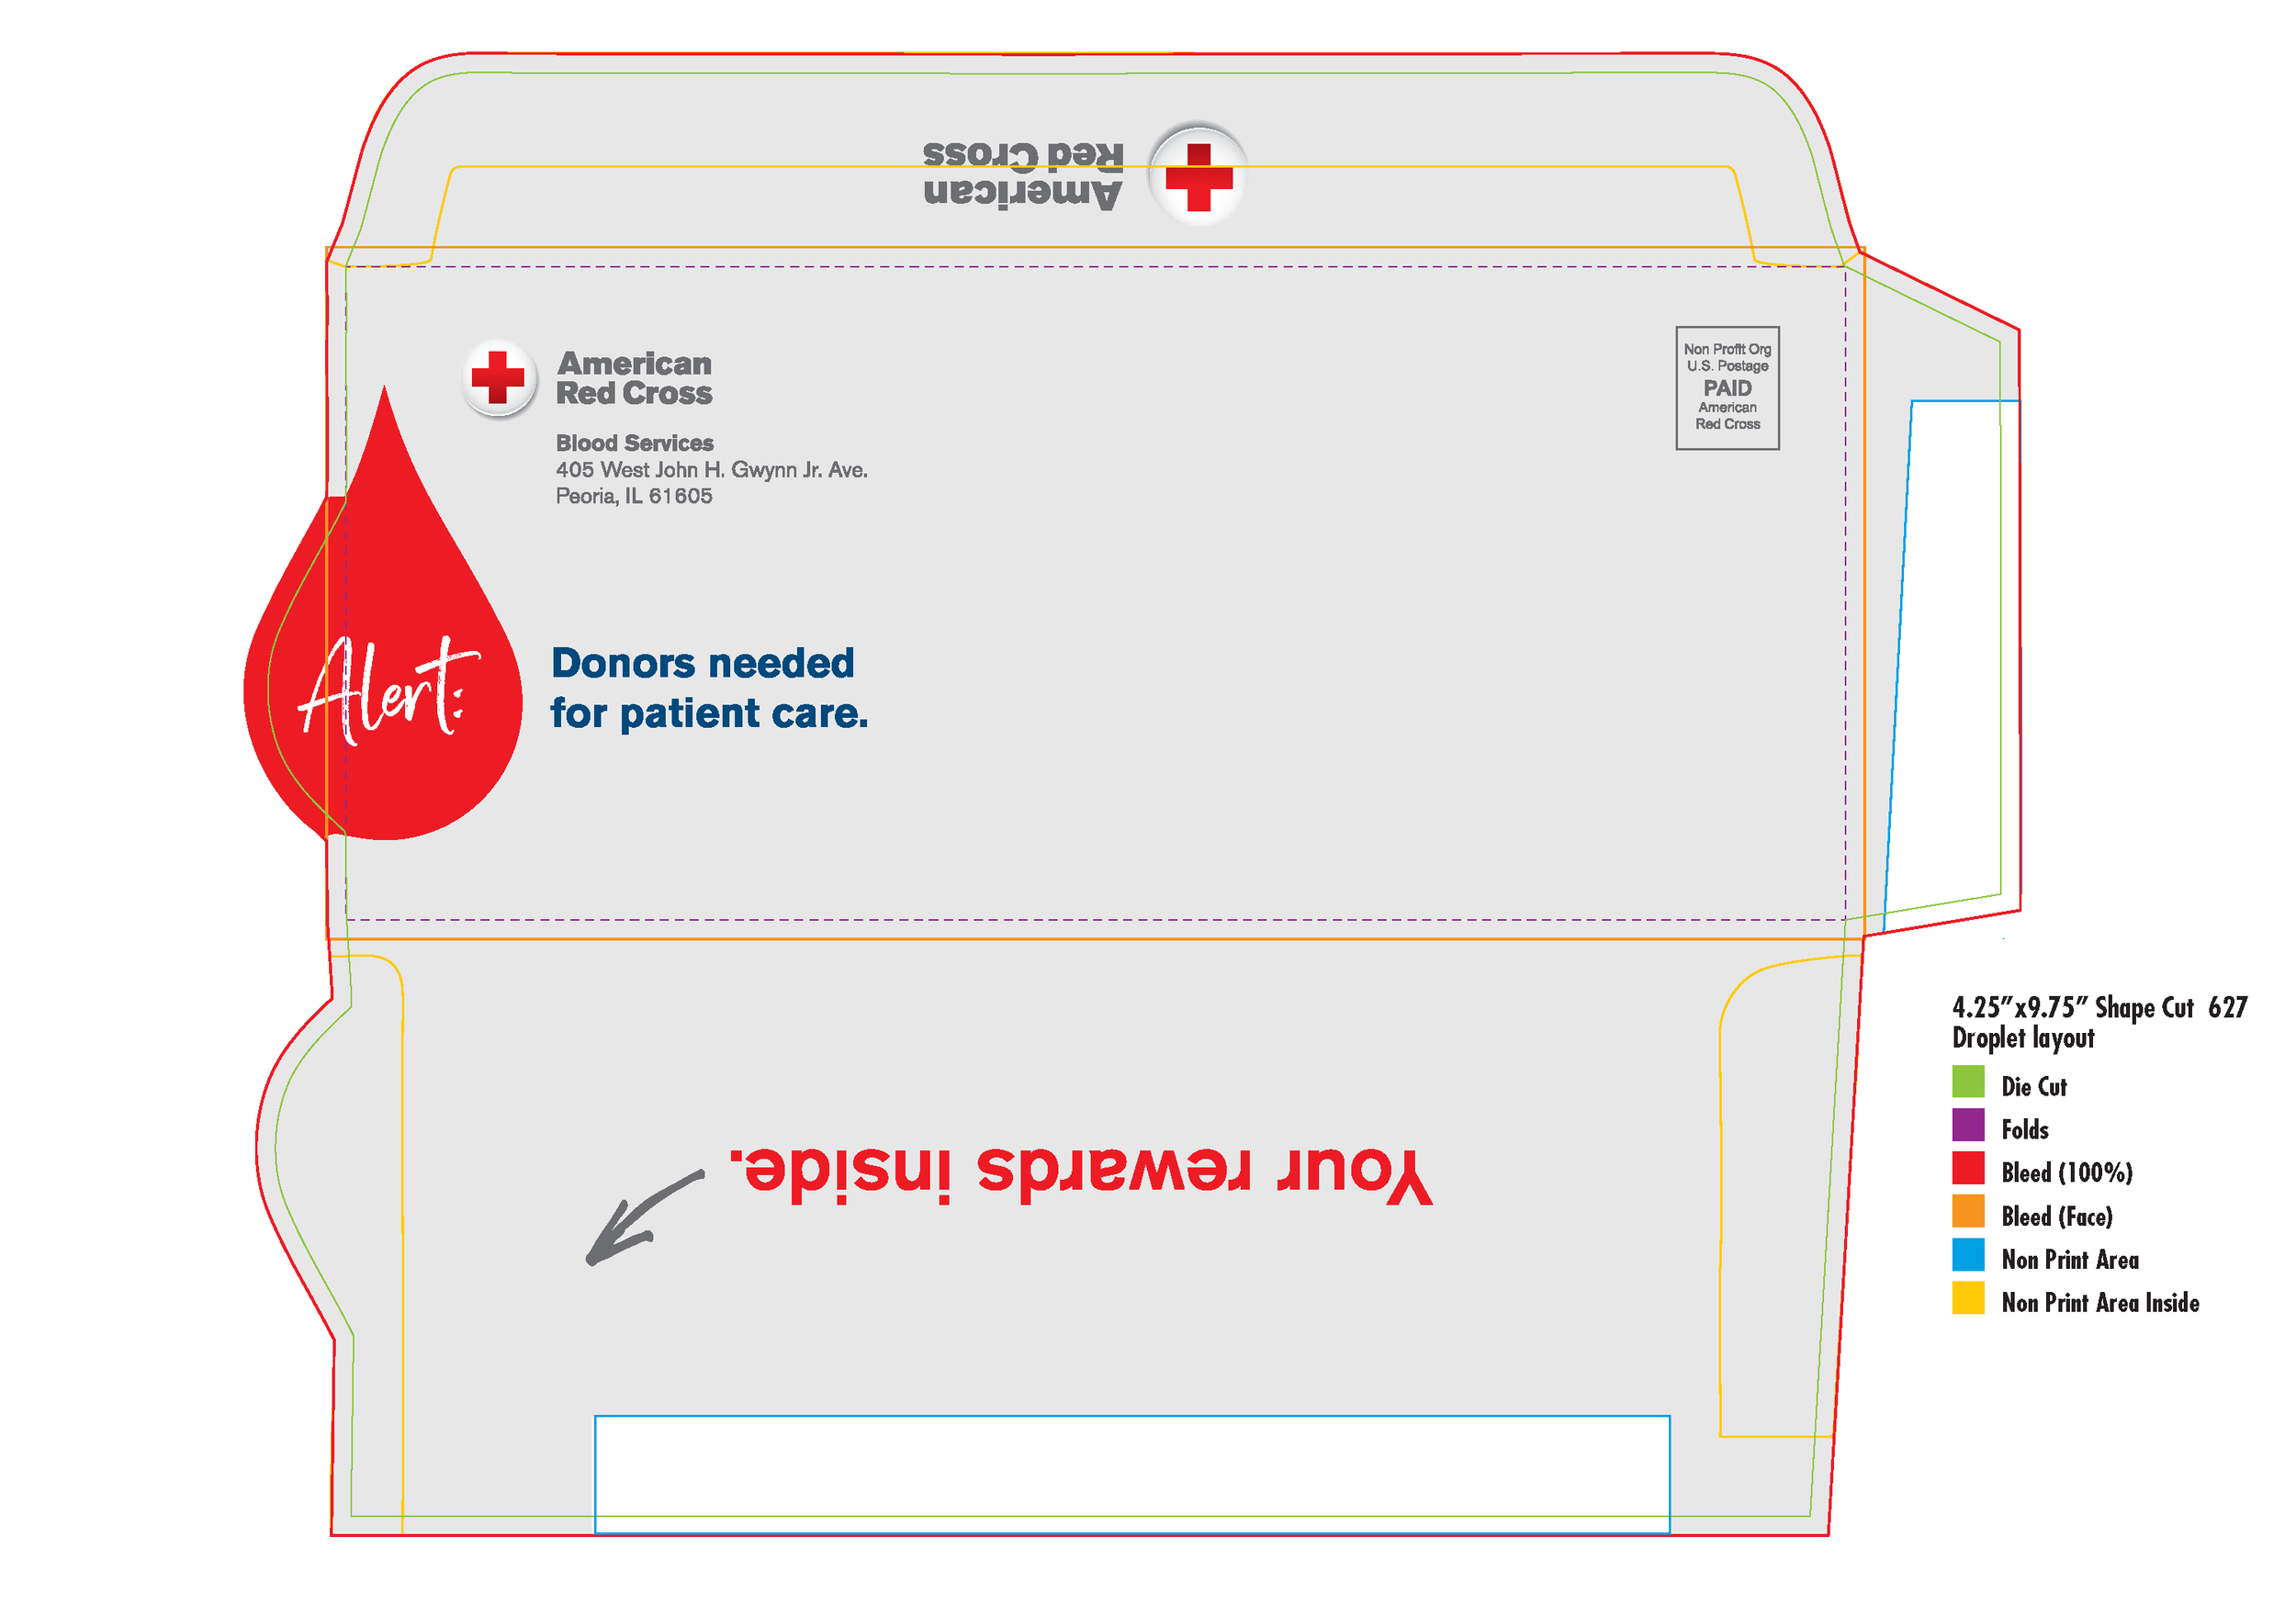
Initial envelope design with all measurements indicated (for body die to be made)

Initial envelope design with all measurements indicated (for body die to be made)

Envelope design with print areas, knock outs, folds indicated (for printer and art placement)

Envelope design with print areas, knock outs, folds indicated (for printer and art placement)
2. Artwork Creation
Once a die is created, approved by the USPS, and approved by the client then artwork is placed accordingly. Designing artwork must take into account special areas indicated in the legends (print areas, bleed areas, folds, etc)
Software used: Adobe Illustrator

Promotional piece- artwork designed and placed in template for production by myself

Promotional piece- artwork designed and placed in template for production by myself

Promotional piece- artwork designed and placed in template for production by myself

Promotional piece- artwork designed and placed in template for production by myself
*This artwork was created by the client, but prepped and placed in template for production by myself
2. Layout creation & artwork placement
Once artwork is placed on our die template, a layout needs to be created and the artwork needs to be placed accordingly on the layout. We do this step after the art is created because we need to see if the final art design has bleeds- this affects the gutter spacing in between each die, just like any other printer. Blade cut layouts (not using body dies, but cut on a straight knife) without bleeds can be butt up right next to each other to save a cut, and in turn save time. If bleeds are present, then a gutter needs to be put in place. All envelope die cut layouts need 3/16” in between each die on the sheet as well as between the dies and the trailing edges of the sheet! This is unconventional compared to regular printing in that anything cut on a straight knife is centered on the sheet. For every envelope that gets printed flat in our facility, there are many variables that need to be taken into account prior to making the layout such as: does the artwork have bleeds, die #, size of envelope, size of sheet, what specific machine it is running on, and what machine is cutting the layout.
TED-C envelopes get cut and manufactured “complete cut” which is different than other envelopes, and in turn get laid out differently as well. While for blade cut envelope layouts the envelopes need to be centered on the sheet, and for die cut envelopes they need to be 3/16” from the trailing edges, complete cut layouts require a little bit of both of these processes. Complete cut layouts need to be centered on the sheet with trim marks like a blade cut envelope layout. If the envelope has bleeds that are not universal, then a trim mark is placed normally but there is a 3/16” gutter space in between the trim mark and the die. TED-C envelopes maintain their irregular shape despite the blade cutting, so the layout is cut into rectangular blanks in our cutting dept. Then, the blanks are fed into one of our presses, in which the envelope is cut into its die shape directly on the press that converts it.
Software used: Adobe Illustrator

Layout created with the TED-C die that was made and ordered

Artwork is placed in the layout created with the TED-C die

Layout created with a TED-C die that was made and ordered
*3/16” gutter in between top and bottom rows

Artwork is placed in the layout created for the TED-C die that was made and ordered
*3/16” gutter in between top and bottom rows- this is because there is not a universal bleed. This also explains by some dies are rotated, to save cuts and time
Final Products
Below are retouched images of the actual foil die that goes on the press final manufactured envelopes


TED-C Foil Die created
Final TED-C envelope created